

French cuisine stands as a timeless masterpiece, revered by gastronomes and food enthusiasts all over the world. Renowned for its elegance, finesse, and rich flavors, French cooking has become synonymous with culinary excellence.
At the heart of this revered tradition lies a multitude of key techniques, meticulously honed and perfected over centuries, that elevate French cuisine to unparalleled heights. These techniques are like secrets handed down through generations of skilled chefs, each adding their own touch to create edible works of art.
From the art of sautéing to the delicate act of deglazing, French cooking techniques showcase a harmonious fusion of precision, passion, and respect for high-quality ingredients. Whether it’s mastering the perfect roux for a velvety sauce or executing a flawless julienne cut, every element of French culinary technique demands meticulous attention to detail.
Beneath their seemingly simple facade, these techniques embody the core principles of French cooking, emphasizing balance, subtlety, and honoring the integrity of each ingredient. By understanding and practicing these fundamental techniques, one can embark on a culinary journey filled with culinary wonders – be it the ethereal lightness of a well-executed soufflé or the sumptuous richness of a perfectly seared filet mignon.
Mise en Place and Knife Skills
At the core of every great French chef’s arsenal lies the essential foundation of mise en place and impeccable knife skills. These two fundamental techniques go hand in hand, setting the stage for seamless and efficient cooking and ensuring the chef’s ability to work with precision and finesse.
The Art of Preparation
Mise en place, meaning “putting in place” in French, is the meticulously organized preparation of ingredients before the actual cooking process begins. This crucial step allows the chef to focus solely on the art of cooking, rather than scrambling to find the necessary ingredients or tools mid-way through the process. Here are some key elements of mise en place:
- Gathering Ingredients: A well-prepared chef must have all the necessary ingredients prepped and ready to go. This includes measuring, chopping, and arranging each component in separate containers, ensuring a seamless transition from one step to another.
- Equipment Readiness: A chef with impeccable mise en place is equipped with all the necessary tools for the recipe at hand. From pots and pans to utensils and gadgets, having everything within arm’s reach saves precious time and avoids unnecessary interruptions.
- Organized Workstation: A clutter-free and organized workspace is the hallmark of a seasoned chef. Every utensil and ingredient must have its designated place, creating an environment that fosters efficiency, focus, and creativity.
Knife Skills
A chef’s knife is not merely a tool to be wielded. It’s an extension of their artistry.
Mastering knife skills is essential for executing flawless cuts, ensuring even cooking, and enhancing presentation. Here are some key aspects of knife skills:
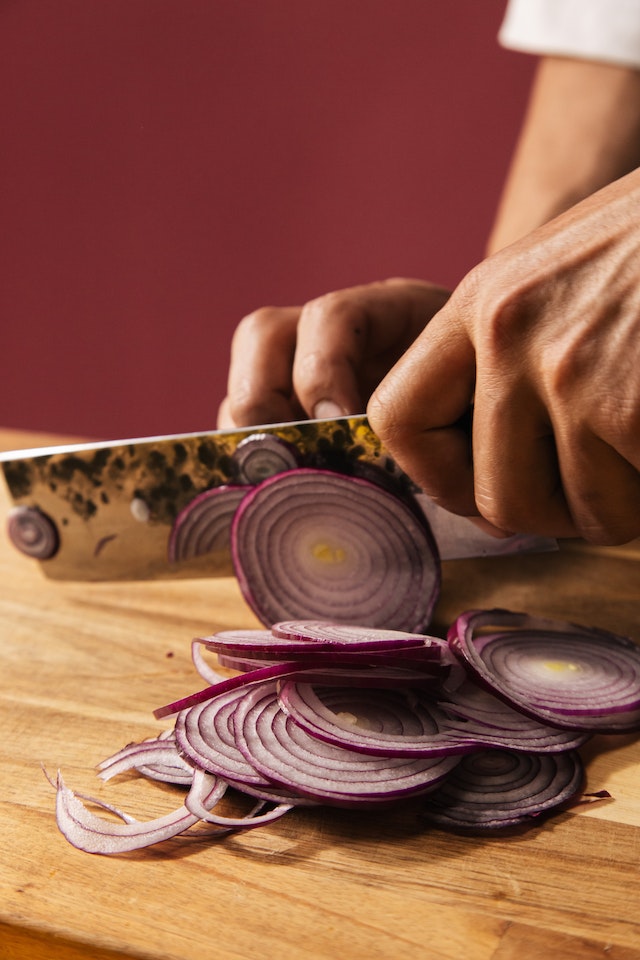
- Knife Holding Techniques: Properly gripping and handling a knife enables the chef to exert control and precision over each slice. Grip the handle firmly, ensuring a comfortable and secure hold, while letting your forefinger and thumb guide the blade’s movement.
- Knife Sharpening: A sharp knife is a chef’s best friend. Regularly honing and sharpening your blades ensures effortless cutting and reduces the risk of accidents. The classic honing steel is used to realign the blade’s edge, while professional sharpening may be required periodically to maintain optimal sharpness.
- Types of Knife Cuts: From the elegant julienne to the rustic brunoise, French cuisine encompasses a wide array of knife cuts. Each cut carries its own purpose, adding texture, aesthetic appeal, and even cooking times to the dish. Mastering these cuts requires practice, precision, and a keen eye for detail.
Sauté
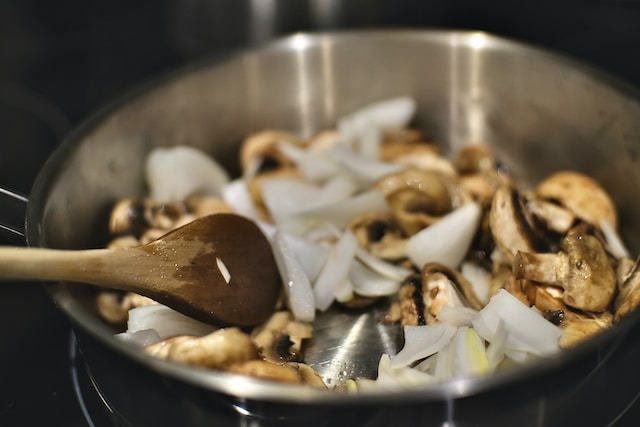
In the arsenal of French cooking techniques, sautéing holds a special place. The word sauté, derived from the French verb “sauter,” meaning “to jump,” perfectly captures the dynamic nature of this cooking method. With its sizzling pan, rapid movements, and enticing aromas, sautéing brings ingredients to life, infusing dishes with depth, color, and flavor. Whether it’s creating a golden sear on meat or coaxing the natural sweetness out of vegetables, sautéing is a skill that every aspiring French chef must master.
The pan should be preheated over medium-high to high heat, allowing it to become hot evenly before adding the oil. Use oils with high smoke points, such as olive oil or clarified butter (known as ghee), to prevent burning and maintain flavor integrity. A thin layer of oil is sufficient to ensure even heating and promote the desired browning effect, allowing the food to cook quickly and retain its texture and moisture.
Maillard Reaction
The Maillard reaction is a chemical process that occurs when proteins and sugars react to heat, resulting in the desirable browning and flavor development in sautéed ingredients. To achieve a proper Maillard reaction, ensure that the ingredients are dry before adding them to the pan.
Excess moisture can impede browning and lead to steaming instead. Allow the ingredients to caramelize and develop a rich golden-brown color, enhancing their flavor profile and adding complexity to the dish.
Deglazing
Once the ingredients are sautéed to desired doneness, the pan may accumulate flavorful browned bits known as “fond.” These bits are a treasure trove of taste and can be transformed into a delicious sauce or glaze by deglazing. Deglazing involves adding a liquid, such as wine, stock, or vinegar, to the hot pan and using a wooden spoon or spatula to scrape off the fond, incorporating its flavors into the liquid. The deglazing liquid can be reduced to create a luscious sauce, adding depth, acidity, or sweetness, depending on the chosen liquid and accompanying ingredients.
Reduction
In the realm of French cooking, reduction is a technique that holds immense power. By simmering a liquid over low heat for an extended period of time, the flavors deepen, intensify, and become concentrated into a luscious, velvety essence. Reduction is a culinary alchemy that transforms ordinary liquids into golden elixirs, enhancing the taste and elevating the overall dining experience.
The process of reduction is a slow, patient dance between heat and time, allowing the liquid to gently evaporate while leaving behind a luxurious symphony of flavors. Here are some key aspects to master when it comes to reduction:
- Choosing the Right Liquid: The liquid used for reduction plays a vital role in determining the final flavor profile of the dish. Common choices include wine, stock, or even fruit juice. Bold red wines can infuse a rich, robust flavor, while white wines offer a lighter and more delicate touch. Vegetable or meat stock adds depth and complexity, while fruit juices bring a hint of sweetness. It’s important to choose a liquid that complements the other ingredients in the dish, creating harmony and balance.

Heat Control: Reduction requires a gentle, steady heat to allow the liquid to slowly evaporate without scorching or boiling over. A low to medium-low heat setting is ideal to maintain control and prevent rapid evaporation. Patience is key; it’s a gradual process that cannot be rushed. The transformative magic occurs as the liquid gradually thickens, intensifying its essence with every passing minute.
- Skimming and Straining: As the liquid reduces, impurities and fats rise to the surface. Skimming off these unwanted elements with a spoon helps to clarify the reduction, resulting in a cleaner, more refined flavor. Straining the reduction through a fine-mesh sieve further ensures a silky, smooth texture, free from any residue or impurities.
- Monitoring and Adjusting: It’s essential to keep a watchful eye on the reduction, periodically testing its consistency and flavor. The goal is to achieve a syrup-like consistency that coats the back of a spoon. If the reduction becomes too thick, it can be thinned with a small amount of liquid. Similarly, if it lacks flavor intensity, a touch of salt or acid, such as lemon juice or vinegar, can be added to enhance its taste.
- Balancing Flavors: Reduction is a powerful tool for balancing flavors. It can add depth, richness, and sweetness to a dish that may be lacking in these elements. However, it’s important to exercise restraint and not overpower the dish with an overly reduced reduction. A delicate balance must be struck to ensure the flavors are harmonious and complementary.
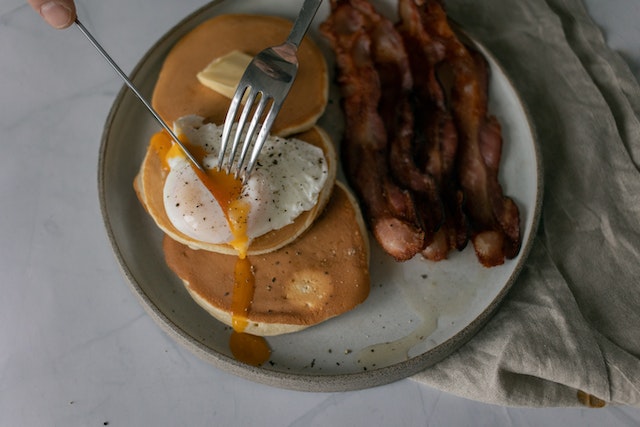
Poach
Poaching stands as a gentle and elegant method of preparing a wide range of delicate ingredients. From tender fish fillets to succulent fruits, this technique beautifully showcases the art of cooking with precision and finesse. By gently simmering ingredients in a flavorful liquid, poaching allows them to retain their natural juiciness, tenderness, and delicate flavors.
The foundation of a successful poaching experience lies in crafting the perfect liquid in which to simmer the ingredients. Here are key elements to consider when creating a flavorful poaching liquid:
- Aromatic Infusions: Enhance the poaching liquid by infusing it with aromatic herbs, spices, and vegetables. Classic aromatics like bay leaves, thyme, and peppercorns add depth and complexity to the dish. Citrus zest, ginger, or lemongrass can bring a refreshing twist to the poaching liquid.
- Wine and Broth: Use a combination of white wine and vegetable or chicken broth to create a flavorful base. The wine adds acidity and complexity, while the broth contributes richness and depth of flavor. The ratio of wine to broth can be adjusted based on personal preference and the desired intensity of flavors.
Subtle Sweetness: A touch of sweetness can balance the flavors in the poaching liquid. Add a spoonful of honey, a splash of fruit juice, or a sprinkle of sugar to provide a subtle hint of sweetness. This addition can enhance the natural flavors of the ingredients being poached.
- Acidic Brightness: A splash of citrus juice, vinegar, or white wine vinegar can bring brightness and balance to the poaching liquid. The acidity cuts through richness and adds a refreshing element to the dish. Experiment with different types of acids to complement the specific ingredient being poached.
Mastering the Poaching Technique
To achieve exceptional results, mastering the art of poaching requires careful attention to detail and precise cooking temperatures. Here are key aspects to consider:
Gentle Heat: Poaching relies on gentle heat rather than vigorous boiling. Maintain a low-simmering temperature, where the liquid shimmers with tiny bubbles, but does not reach a rolling boil. This gentle cooking method ensures that ingredients remain tender and do not overcook or become tough.
Proper Prep: Before poaching, ensure that the ingredient is well-prepared and free from any unwanted elements. For fish fillets, remove any pin bones to ensure a seamless dining experience. For fruits, remove any pits or cores. This preparation ensures that the poaching process goes smoothly.
Timing and Testing: The cooking time for poaching can vary depending on the size and thickness of the ingredient. It is crucial to keep a close eye on the cooking process and test the doneness regularly. Gently press the ingredient with a fork or skewer to check for the desired tenderness. Remember that ingredients will continue to cook slightly even after being removed from the poaching liquid, so take care not to overcook.
Rest and Serve: After poaching, allow the ingredient to rest briefly before serving. This resting period allows the flavors to meld and the juices to redistribute within the ingredient, resulting in optimal taste and texture. Carefully transfer the poached item to serving plates or bowls, ensuring that it remains intact and visually appealing.
Flambé
The act of flambéing is a thrilling spectacle that has the power to captivate both the eyes and the taste buds. This extraordinary cooking technique not only adds a touch of drama to the culinary experience but also enhances the flavors and aromas of the dish. With a burst of flames and a burst of flavor, flambéing showcases the artistry and passion behind French cuisine.
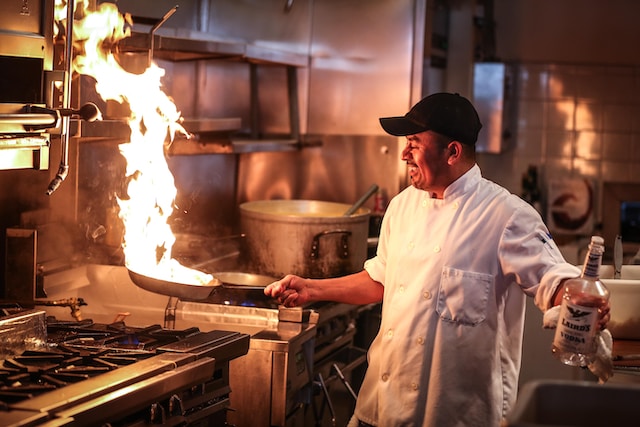
Flambéing involves the careful ignition of alcohol, which creates a dazzling display of dancing flames. This technique not only adds excitement and visual appeal to a dish, but it also imparts a unique depth of flavor. When the alcohol ignites, it burns off the harsh edges, leaving behind a subtle hint of sweetness and a complex aroma that elevates the overall taste profile.
The selection of the appropriate alcohol is crucial for a successful flambé. Liquors with a high alcohol content, such as brandy, cognac, rum, or liqueurs, are commonly used. Each alcohol brings its own distinct flavors and nuances to the dish. Brandy or cognac lends a rich, fruity complexity, while rum adds a warm, tropical essence. Experimenting with different alcohols allows for creative and personalized flambé experiences.
Preparing for Flambé
Before igniting the alcohol, there are a few essential steps to follow to ensure safety and maximize results:
- Move to a Safe Space: Make sure you have a clear and safe area to work in, away from any flammable objects. It’s best to have a fire extinguisher nearby as a precautionary measure.
- Warm the Alcohol: In order to facilitate the ignition process, warm the alcohol slightly before adding it to the dish. This can be done by gently heating it in a separate container until warm to the touch but not boiling.
- Create the Flambé Sauce: Combine the alcohol with other flavoring ingredients, such as sugar, herbs, or spices, in a saucepan or skillet. Allow the mixture to simmer and reduce to concentrate the flavors before igniting.
Executing the Flambé
Now, it’s time for the moment of truth – igniting the alcohol. Follow these steps to execute a successful flambé:
- Move the Pan Away: Slide the pan away from direct heat to a safe distance, making sure no flammable objects or curtains are nearby.
- Tilt the Pan: Gently tilt the pan away from you, holding the handle securely, to allow the alcohol to come into contact with the heat source. This movement facilitates the combustion process.
- Ignite the Alcohol: Using a long match or a long-handled lighter, carefully bring the flame to the edge of the pan, allowing the ignited alcohol to ignite the rest. Be cautious and alert during this step.
- Control the Flames: As the alcohol ignites, keep a close eye on the flames. Tilt and swirl the pan gently to distribute the heat evenly and prevent any hot spots. This motion ensures that the dish is cooked evenly and the alcohol burns off completely.
- Extinguish the Flames: To extinguish the flames, simply cover the pan with a lid or a fireproof plate. The lack of oxygen will smother the flames, bringing an end to the spectacle.
Once the flames subside, the dish is now infused with the enticing flavors of the ignited alcohol. The resulting sauce or glaze can be poured over the main ingredient or used as a base for further culinary creations. The complex flavors and aromas created by the flambé technique lend a sophisticated touch to a wide range of dishes, from succulent steaks to buttery desserts.
French cooking techniques embody the artistry and passion that have made French cuisine legendary. By mastering these key culinary techniques, one can embark on a gastronomic journey that celebrates the beauty and complexity of French cooking. So, take up your knife, heat up your pans, and immerse yourself in the timeless art of French cuisine. Bon appétit!