

Fruits are nature’s sweet treat to the human palate. They are tasty, healthy, and full of essential nutrients that are good for the body. However, their seasonal availability limits our enjoyment of them. But with fruit preservation techniques, we can preserve the fruits’ freshness, flavor, and nutritional value for extended periods, even off-season. Whether it’s canning, dehydrating, or freezing, preserving fruits provides us with a fruitful solution to enjoy them all year round.
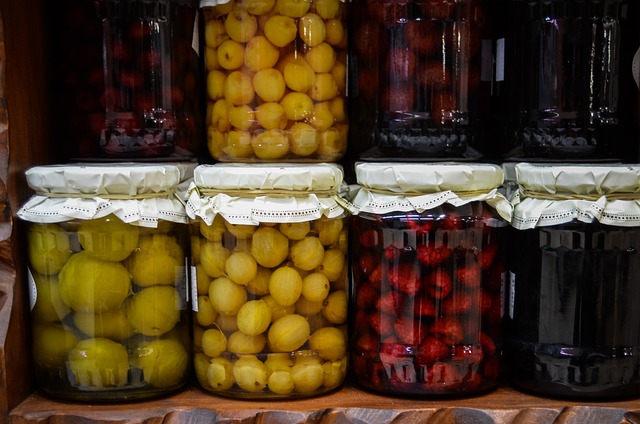
Canning Fruits
Canning fruits is one of the oldest and most traditional methods of fruit preservation. This technique involves heating the fruit and sealing it in a jar to prevent the growth of spoilage microorganisms. Canning is a popular way to preserve fruits such as peaches, pineapples, apricots, and cherries. Here’s how it’s done.
Preparation
Before canning fruits, it’s essential to select the right fruit. Choose fruits that are ripe, firm, and free from any bruises or blemishes. Wash the fruit thoroughly under running water and peel or pit them as needed. Next, sterilize the jars and lids by placing them in boiling water for at least 10 minutes.
Cooking
There are two methods of cooking fruits for canning: hot and raw pack. In hot packing, the fruits are cooked in a syrup or water before being placed in the jars. Hot packing helps the fruit retain its shape and texture after canning. In raw pack, the fruit is packed raw into the jars with little to no added liquid. Raw packing is useful for fruits that tend to break down or release juice, such as berries.
Filling the Jars
Fill the jars with the prepared fruit, leaving some space at the top for the liquid to expand during processing. Add the syrup or liquid to cover the fruit, leaving ½ inch of headspace at the top. Run a spatula or knife along the inside of the jar to remove air bubbles. Wipe the rims of the jars to ensure a proper seal, then place the lids and screw the bands on top.
Processing
Processing the jars is the final step in canning fruits. The jars can be processed in a boiling water bath or a pressure canner. The processing time varies depending on the fruit and whether the pack was hot or raw.
Properly processed jars should be stored in a cool, dry place and consumed within a year.
Benefits of Canning Fruits
Canning fruits has many benefits. It allows you to enjoy your favourite fruits all year round, even when they are out of season. Canned fruits are great for making jams, jellies, and fruit sauces. They also make a great snack or dessert topping. Canned fruits are also convenient and easy to store, making them a great addition to any pantry.
Canning is a great way to preserve fruits and enjoy them long after their growing season. It’s a simple and straightforward process that can be done by anyone with a few basic tools.
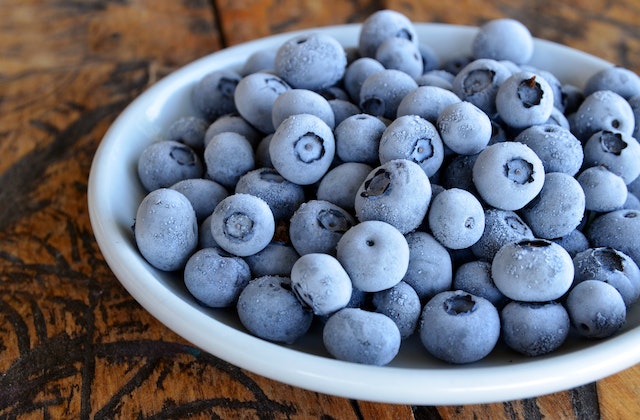
Freezing Fruits
Freezing fruits is a popular and easy preservation method that allows you to enjoy your favourite fruits even when they are out of season. Frozen fruits are convenient for making smoothies, pies, and other desserts. Freezing also retains the fruits’ nutritional value and texture, making it an excellent preservation option.
Below are some tips to help you freeze fruits easily and effectively:
Choose the right fruit.
Not all fruits are suitable for freezing. Some fruits have a high water content, which can damage their texture when frozen. Examples of fruits that freeze well include berries, grapes, mangoes, bananas, and pineapples. Before freezing the fruits, wash and hull them if necessary.
Cut the fruit into small pieces.
Cutting the fruit into small pieces before freezing will make them easier to use in recipes later. Cut the fruit into uniform sizes, such as quarters or slices, to make it easier to portion and use.
Pre-treat the fruit.
Before freezing, you can pre-treat some fruits with ascorbic acid or lemon juice to prevent browning. For instance, you can dissolve one tablespoon of ascorbic acid or lemon juice in one quart of water and immerse the fruits in the solution for about five minutes.
Pack the fruit appropriately.
Once the fruits are prepped, pack them into airtight containers or freezer bags. The containers should be labeled with the date of freezing and the fruit type. Leave some space at the top of the containers to allow the fruits to expand during freezing.
Freeze the fruit.
Place the containers or freezer bags of fruit in the freezer. It is essential to freeze them as soon as possible to maintain their freshness. Frozen fruits should be stored at 0 degrees Fahrenheit or lower.
Thaw the fruit correctly.
When you are ready to use the frozen fruits, thaw them in the fridge overnight. Avoid thawing them at room temperature, as this can lead to spoilage.
Benefits of Freezing Fruits
Freezing fruits has several benefits, including:
Convenience: Frozen fruits are convenient and ready to use in recipes. You can take out the amount you need without worrying about the rest going to waste.
Preservation of Nutritional Value: Freezing preserves the fruits’ nutrients because the fruits are not cooked during the preservation process.
Texture Retention: Many fruits maintain their texture when frozen. For instance, berries retain their plumpness and shape, making them perfect for use in desserts.
Extended Shelf Life: Frozen fruits can last up to a year in the freezer, making them a great way to enjoy fruits during seasons when they are not readily available.
Dehydrating Fruits
Dehydrating fruits involves removing the fruits’ moisture by exposing them to low heat and air circulation. This method of fruit preservation is convenient, cost-effective, and easy to do. Below are some tips to help you dehydrate fruits easily and effectively:
Choose the right fruit: Almost any fruit can be dehydrated, but some fruits are better suited for this preservation method. Fruits with a high water content are not suitable for dehydration. Examples of fruits that dehydrate well include apples, bananas, apricots, peaches, and pears.
Wash and peel the fruit: Wash the fruits thoroughly under running water to remove any dirt or debris. For some fruits, such as apples, peeling may be necessary before dehydration.
Slice the fruit: Slice the fruit into equal-sized pieces for even drying. The thinner the slices, the faster the drying time. Make sure all slices are of uniform thickness to ensure they dry at the same rate.
Pre-treat the fruit: Some fruits, such as apples and pears, may brown during dehydration. To prevent fruit browning, you can pre-treat the fruit in a solution of lemon juice and water or use a commercial pre-treatment product.

Arrange the fruit on the dehydrator: Arrange the fruit slices on the dehydrator trays, leaving some space between each slice for proper air circulation. You can use parchment paper or silicone mats to prevent the fruit from sticking to the trays.
Set the dehydrator temperature: Set the dehydrator to the appropriate temperature for the fruit you are dehydrating. The temperature and drying time vary depending on the fruit and the thickness of the slices. For example, apples may take 6-12 hours to dry at 135°F.
Check the fruit regularly: Check the fruit after a few hours to ensure it is drying evenly. Flip the fruit slices to ensure they dry on both sides. You can also rotate the trays to ensure even drying.
Store the dehydrated fruit: Once the fruit is fully dehydrated, let it cool completely before storing it in an airtight container. The dehydrated fruit should be stored in a cool, dry, and dark place. They can last up to a year when stored correctly.
Benefits of Dehydrating Fruits
Dehydrating fruits have several benefits, including:
Convenience: Dehydrated fruits are convenient and make a great snack or ingredient for various recipes. They are lightweight and easy to store, making them ideal for camping or hiking trips.
Retention of Nutritional Value: Dehydrated fruits retain their nutritional value. The process of dehydration removes only the water from the fruit while preserving its vitamins and minerals.
Extended Shelf Life: Dehydrated fruits have an extended shelf life, allowing you to enjoy them long after their ripening season. They are also an excellent way to reduce food waste.
Cost-Effective: Dehydrating fruits is a cost-effective way to preserve them. You can buy fruits during their peak season when prices are lower and dehydrate them for future use.
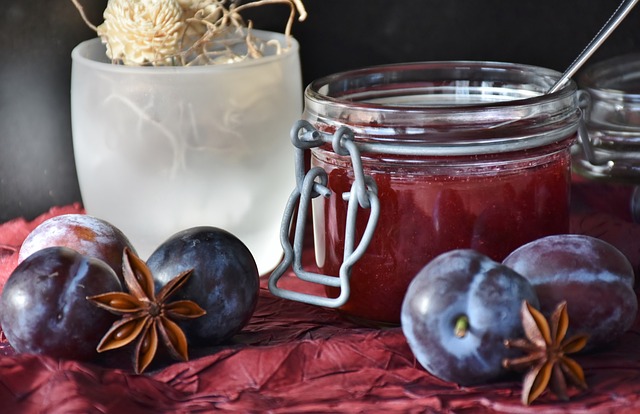
Making Jams and Preserves
Jams and preserves are sweet, spreadable toppings that can be made from almost any fruit imaginable. From berries to plums, peaches, and beyond, the possibilities are endless.
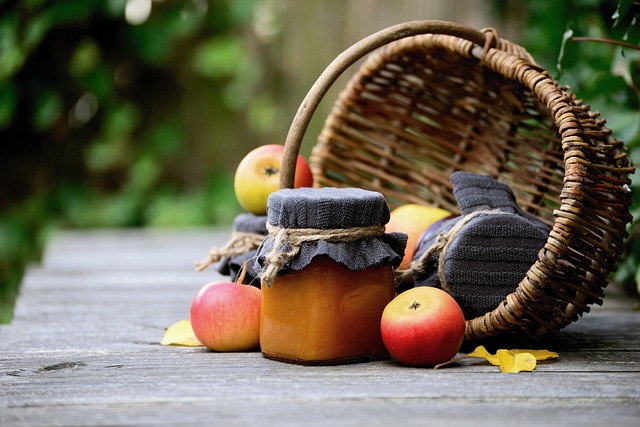
Making jams and preserves is not only an excellent way to use up excess fruit but also an art of fruit preservation. By following the steps below, you can learn how to make jams and preserves that will last for months to come.
Selecting the Fruit
The first step in making jams and preserves is selecting the right fruit. The fruit should be fresh, ripe, and free from bruises or blemishes. It is best to use fruits that are in season for optimal flavor and texture. Some fruits, like strawberries, raspberries, and blackberries, require less sugar due to their natural sweetness, while others, like peaches and apricots, require more sugar to balance out their acidity.
Preparing the Fruit
After selecting the fruit, it is time to prepare it for jam or preserve making. The fruit should be washed, dried, and pitted or sliced as needed. For berries, it is best to leave them whole. For larger fruits like peaches or plums, it is best to dice them into small pieces. The fruit should also be weighed to ensure the right amount is used.
Cooking the Fruit
Once the fruit is prepped, it is time to cook it. The fruit is combined with sugar in a pot and heated over medium heat until the sugar dissolves. The mixture is then boiled until it reaches the gelling point. The gelling point is when the jam or preserve reaches 220°F or when it coats a spoon and doesn’t run off. To check this, you can put a spoonful of the jam or preserve onto a chilled plate. Push it with your finger, and if it wrinkles, it is ready. Skim any foam that may form on the top with a spoon or a ladle.
Sealing the Jars
After the jam or preserve has reached the correct gelling point, it is time to seal the jars. The jars should be sterilized by boiling them for at least 10 minutes or by running them through a dishwasher cycle. Ladle the hot jam or preserve into the jars, leaving ¼ inch of headspace.
Wipe the rim of the jar with a clean cloth to remove any residue, then place the lid on top and tighten the band. The jars should be processed in a water bath canner for 10-15 minutes, depending on the recipe.
Storing the Jars
After processing, the jars should be left to cool on a towel or a cooling rack for 24 hours. During this time, you will hear a popping sound as the jar lid seals. After 24 hours, test the seal by pressing the center of the lid with your finger. If it pops back, the jar is not sealed and should be refrigerated and consumed within a week. If it stays down, the jar is sealed and can be stored in a cool, dry place for up to a year.
Fruit preservation techniques offer us a delicious and innovative way to enjoy fruits at any time of the year. Whether it’s canning, freezing, dehydrating or making jams and preserves, there are many ways to preserve the freshness, flavor, and nutritional value of our favorite fruits. Additionally, these methods are cost-effective, convenient, and easy to master. With these techniques, we can embark on a fruitful journey of exploration while indulging in the irresistible flavors of nature’s bounty.